
Monday, April 8, 2013
Spring Paper Medallion Wreath

I put this pretty wreath together over the weekend and I'm thrilled with how sweet and springy it came out! Here's how I made it.
Materials and Supplies
- Wreath form
- Yarn
- Scrapbook paper (various patterns)
- Hot glue gun
- Paper cutter
- Burlap
- Stones (those clear ones from the dollar store)
- Letter stickers
- Ruler
- Pencil

1. Wrap the wreath form in yarn (not shown).
Wrap the yarn around the wreath. Keep it tight, so none of the wreath shows through.
2. Measure the pieces of scrapbook paper.
I measured a 12x12 paper into 4x6" and 3x6" pieces.

3. Cut the scrapbook paper.
I used my paper cutter to do it. You could also use scissors.
4. Accordion fold the paper.
I used two 4x6" pieces to make the larger (base) medallions and 3x6" pieces to make the smaller (top) medallions.

5. Fold each accordion in half.

6. Hot glue the center of the "fan."
Hold it tight for 10 seconds or so. Repeat with the other fan.
7. Apply glue to the outside of the fan.
Match two fans together. Try to line up the ends of each fan and the center portion of the fan. Then glue the other sides of the medallions together to make a circle.

8. Release the two pieces of paper so you have a medallion.
Glue the center folds of the medallion.
9. Make the center of the flower using the glass stones and burlap.
Cover the stones in burlap, then adhere with hot glue. Trim any excess burlap.

10. Glue the large medallion, small medallion, and burlap center together.
Use your hot glue gun to do this and make sure to hold in place for at least 10-20 seconds.

11. Glue each of your medallion flowers to the wreath.
Make sure to lay them out so they are even across the wreath, or lay them out however it strikes your fancy.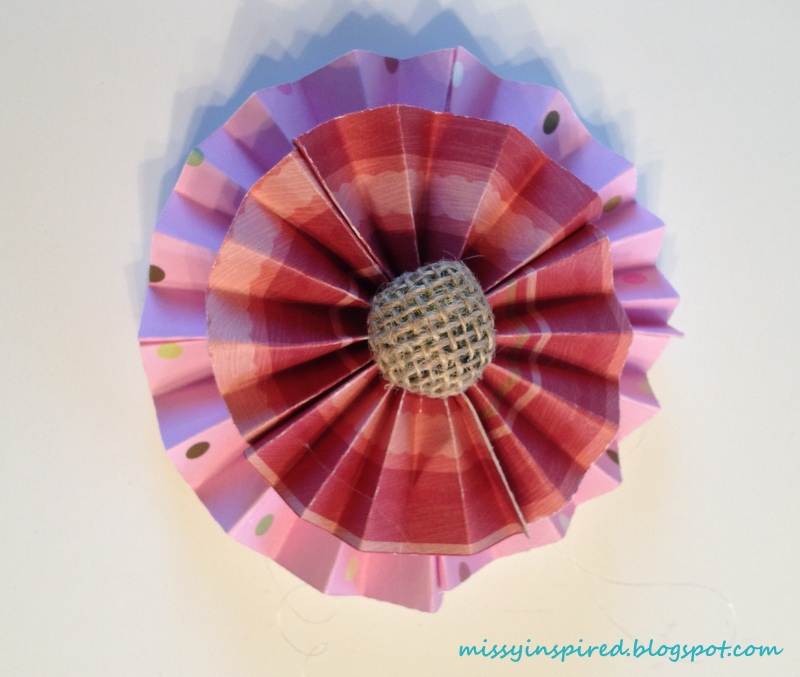
12. Make a "Spring" banner.
I cut pieces of burlap approximately 2x2". I then glued the burlap to the yarn. Then stuck the letter stickers to the burlap pieces. I used some hot glue to stick the letters to the burlap, to make sure they don't fall off.
13. Tie the banner to the wreath.
Then tie another short piece of yarn to the top so you can hang the wreath.
Link Parties
Click here to see the link parties I visit each week.
Subscribe to:
Post Comments
(Atom)


Subscribe To


Grab A Button


I love your wreath, it is very cute! I would love for you to share this on my weekly link party Blog Stalking Thursday. Thanks for the inspiration!
ReplyDeleteAdorable wreath! Love the mix of colors. I wanted to let you also know that I've nominated your blog for a Liebster Award! To find out more about your award please check out my post: http://www.lifealittlebrighter.com/2013/04/liebster-award.html
ReplyDeleteCan I copycat this one? Love it:)
ReplyDeleteMissy, I love this wreath! And your blog! I have also nominated you for the Liebster Award! Come over and find out more about your award! http://simplygloria.com/liebster-award/
ReplyDeleteLove the wreath! Pinning.
ReplyDeleteI love this, so cute!
ReplyDeleteHolly at Not Done Growing
I LOVE this!! I have been looking for craft ideas to do with all my scrapbook paper and this is perfect, I can't wait to make one!! Great tutorial! I would love for you to link up at SHOW-licious Craft Showcase.
ReplyDeleteJust follow the link....http://sew-licious.blogspot.com/2013/04/show-licious-craft-showcase-26.html.
Marti
What a cute idea. I love the way this turned out. Great job. thanks for linking up at http://viewfromrivermountain.blogspot.com/2013/04/show-it-off-wednesday-7.html
ReplyDeleteSo cute!!
ReplyDeleteNew follower from the Aloha hop! Hope you follow back!
Very cute!! New follower via the blog hop-I'd love you to visit :)
ReplyDeleteSusan
I love this adorable spring wreath!! Thank you for a great tutorial :)
ReplyDeletexo, Tanya
twelveOeight
This is so cute! Come link up sometime @ DearCreatives.com Happy Spring!
ReplyDeleteYour wreath is just darling! You give a good tutorial. Thanks for joining us this week at Transformed Tuesday.
ReplyDeleteHugs,
Peggy~PJH Designs
So cute and colorful!
ReplyDeleteMissy, Your wreath is so adorable! Thank you for linking to the Open House party and check at this weeks party to see the wreath featured.
ReplyDeleteHugs,
Sherry
Your wreath is just adorable. I love the colors!
ReplyDeleteI love, love, love this wreath! This is wonderful! Thanks so much for sharing! Found you via Wait Til Your Father Gets Home link party!
ReplyDeleteCheers,
Julia
It's Always Ruetten
I love the colors and the use of burlap! Lovely wreath!
ReplyDelete~Emily
http://tossedsaladlife.com
What a great idea. Thanks for sharing. http://craftwithcartwright.blogspot.co.uk
ReplyDeleteLove it. The colors are so pretty!
ReplyDeleteAnjana @ http://happyandharried.wordpress.com
Such a sweet spring wreath, I do need to get one up on my door.
ReplyDeleteThis is adorable! I LOVE it, great job!!
ReplyDeleteKrista @thehappyhousie
Love this - so pretty!
ReplyDeleteI would love for you to link up at the Empty Your Archive link party - we've got a special feature this week on wreaths, Alice x
Your blog is extremely brilliant. Quality contents are here.
ReplyDeleteregular cleaning