
Thursday, April 25, 2013
Paper Medallion Spring Bouquet

After I finished my Spring Paper Medallion Wreath, I still had a lot of medallions left over. I decided to put together this cute spring bouquet to go with my spring mantel. Here's how I did it!
Materials and Supplies
- Scrapbook paper
- Hot glue gun
- Floral foam
- Lollipop or popsicle sticks
- Buttons
- Flower pot

How to Make This
1. Make the paper medallions.
See the full tutorial that I did for my Paper Medallion Spring Wreath for how to make these.
2. Glue a button to the center of the medallion.

3. Apply hot glue to the lollipop stick.

4. Squeeze the folds of the medallion around the lollipop stick (with the glue still hot).

5. Cut a piece of floral foam and put it into the flower pot.

6. Place the finished medallion "flowers" into the floral foam, to keep them in place.
Place the "flowers" at different levels.
Link Parties
Click here to see the link parties I visit each week.
Wednesday, April 17, 2013
Spring Chalk-Bird Flower Pots
Aren't these pots pretty? I made them for the grandparents for Easter. I'm pretty happy with how they came out. What do you think?

Materials and Supplies
- Terra cotta pots
- Chalkboard paint
- Craft paint (pastel colors)
- Black craft paint
- Stencil
- Foam brush
- Foam spouncer
- Paint brush
- Chalk

How to Make This
1. Paint on several coats of chalkboard paint.
I started with the chalkboard paint. However, since the pots are so porous, it took SIX coats of chalkboard paint to get enough coverage. Next time, I would start with a primer or craft paint first to get more coverage.


2. Prepare your stencils.
I bought a wall stencil with three birds. I decided to cut this into three birds so each pot would be different.
3. Tape the stencil to the pots.
Try to get them flush to the pots so there are no gaps.
4. Use the foam spouncer to fill in the stencil with craft paint.
Use a light touch when you do this so the paint doesn't seep under the stencil. I did three coats of the blue paint.
5. Paint the edge of the saucer rim.
I just dabbed it on with the spouncer. At the end, I tried to draw a straight line with a paint brush, but I'm not sure that was necessary.
6. Untape the stencil.
The lines of my stencil weren't as crisp as I had hoped. I used a paint brush and black craft paint to make the lines a little smoother.
7. Write the name on the pot with chalk.

8. Add flowers or herbs to the pots.


Link Parties
Click here to see the link parties I visit each week.
Monday, April 8, 2013
Spring Paper Medallion Wreath

I put this pretty wreath together over the weekend and I'm thrilled with how sweet and springy it came out! Here's how I made it.
Materials and Supplies
- Wreath form
- Yarn
- Scrapbook paper (various patterns)
- Hot glue gun
- Paper cutter
- Burlap
- Stones (those clear ones from the dollar store)
- Letter stickers
- Ruler
- Pencil

1. Wrap the wreath form in yarn (not shown).
Wrap the yarn around the wreath. Keep it tight, so none of the wreath shows through.
2. Measure the pieces of scrapbook paper.
I measured a 12x12 paper into 4x6" and 3x6" pieces.

3. Cut the scrapbook paper.
I used my paper cutter to do it. You could also use scissors.
4. Accordion fold the paper.
I used two 4x6" pieces to make the larger (base) medallions and 3x6" pieces to make the smaller (top) medallions.

5. Fold each accordion in half.

6. Hot glue the center of the "fan."
Hold it tight for 10 seconds or so. Repeat with the other fan.
7. Apply glue to the outside of the fan.
Match two fans together. Try to line up the ends of each fan and the center portion of the fan. Then glue the other sides of the medallions together to make a circle.

8. Release the two pieces of paper so you have a medallion.
Glue the center folds of the medallion.
9. Make the center of the flower using the glass stones and burlap.
Cover the stones in burlap, then adhere with hot glue. Trim any excess burlap.

10. Glue the large medallion, small medallion, and burlap center together.
Use your hot glue gun to do this and make sure to hold in place for at least 10-20 seconds.

11. Glue each of your medallion flowers to the wreath.
Make sure to lay them out so they are even across the wreath, or lay them out however it strikes your fancy.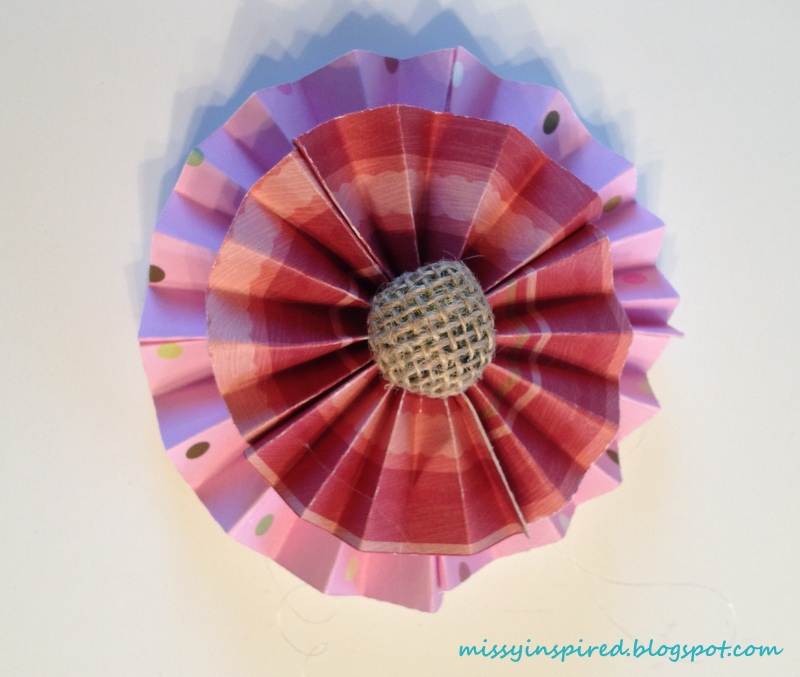
12. Make a "Spring" banner.
I cut pieces of burlap approximately 2x2". I then glued the burlap to the yarn. Then stuck the letter stickers to the burlap pieces. I used some hot glue to stick the letters to the burlap, to make sure they don't fall off.
13. Tie the banner to the wreath.
Then tie another short piece of yarn to the top so you can hang the wreath.
Link Parties
Click here to see the link parties I visit each week.
Friday, April 5, 2013
Friday I'm in Love: This Week's Inspiring Projects!
I haven't been doing the Friday I'm in Love post the last couple of months because I've been so busy with Valentine's Day, St. Patrick's Day, and Easter projects. Since I was a co-host of the Ginger Snap Crafts link party this week, I thought this would be a perfect time to bring back the Friday I'm in Love series!
Felt Wreath from Life on Virginia Street
This is such a pretty wreath. I especially love the white wreath on the black door.

Spring Chevron Wreath from Happy House of 5
This wreath screams "Spring" to me. It's so cheerful!

Painted Chair Makeover from A Cultivated Nest
I'm a sucker for painted furniture. I especially like the blue chair with the red fabric. It has such a country chic look!

Birch Bark and Moss Picture from Decorated Chaos
I am obsessed with moss right now. I love the match up of the moss with the birch and the bunny picture. Adorable!

Monogrammed soap dispensers from Southern Scraps
This is a cheap way to make an ordinary hand soap dispenser pretty. I especially like the sharpness of the black monogram on the white soap.

Goodwill Mirror Makeover at Something to be Found
I love a trash-to-treasure type makeover and this one, with it's baby blue paint is really pretty!

DIY Spring Wreath from Ashley's Dandelion Wishes
I am amazed by Ashley's patience and attention to detail in doing this wreath. The end result is really pretty!

Happy Spring Mantel from Inspired Honey Bee
How happy is this? It doesn't get more springy than a bunch of pinwheels!

DIY Topiaries from Days of Chalk and Chocolate
I love a topiary and I'm obsessed with moss balls right now, so I love this project!

Thanks to everyone who participated in this week's link party and for Ginger Snap Crafts for having me as a co-host! Click here to join the party or to see some of the other entries!
Felt Wreath from Life on Virginia Street
This is such a pretty wreath. I especially love the white wreath on the black door.
Spring Chevron Wreath from Happy House of 5
This wreath screams "Spring" to me. It's so cheerful!
Painted Chair Makeover from A Cultivated Nest
I'm a sucker for painted furniture. I especially like the blue chair with the red fabric. It has such a country chic look!
Birch Bark and Moss Picture from Decorated Chaos
I am obsessed with moss right now. I love the match up of the moss with the birch and the bunny picture. Adorable!
Monogrammed soap dispensers from Southern Scraps
This is a cheap way to make an ordinary hand soap dispenser pretty. I especially like the sharpness of the black monogram on the white soap.
Goodwill Mirror Makeover at Something to be Found
I love a trash-to-treasure type makeover and this one, with it's baby blue paint is really pretty!
DIY Spring Wreath from Ashley's Dandelion Wishes
I am amazed by Ashley's patience and attention to detail in doing this wreath. The end result is really pretty!

Happy Spring Mantel from Inspired Honey Bee
How happy is this? It doesn't get more springy than a bunch of pinwheels!
DIY Topiaries from Days of Chalk and Chocolate
I love a topiary and I'm obsessed with moss balls right now, so I love this project!
Thanks to everyone who participated in this week's link party and for Ginger Snap Crafts for having me as a co-host! Click here to join the party or to see some of the other entries!
Tuesday, April 2, 2013
It's Party Time at Wow Me Wednesday
Today I'm excited to be a co-host of my very first Link Party. This is a party I visit every week, so when Ginger at Ginger Snap Crafts said she was looking for co-hosts to celebrate her 2-year blogiversary, I jumped at the chance!
I'm happy to be a co-host and to check out all of this week's projects. I plan to feature a few of the projects this week, so be sure to check back here throughout the week!


Be sure to come back to my blog throughout the week to see the featured projects and stop by Ginger Snap Crafts to wish her a happy blogiversary!
I'm happy to be a co-host and to check out all of this week's projects. I plan to feature a few of the projects this week, so be sure to check back here throughout the week!
These are the party rules:
The "rules' are simple.
Please consider sharing this party on
Facebook, twitter, Google+ or Pinterest.
Link up to your post, not your main blog.
Must be something made by you!
{No Etsy shops, giveaway or business links, please.}
Link up to your post, not your main blog.
Must be something made by you!
{No Etsy shops, giveaway or business links, please.}
Visit other links, make new friends & most of all have fun!
Be sure to come back to my blog throughout the week to see the featured projects and stop by Ginger Snap Crafts to wish her a happy blogiversary!
Monday, April 1, 2013
Easy pastel spring candles

I put together these simple spring candles to go on my Easter mantel. These were so easy and pretty that I think I'm going to keep them around a little longer and possibly try some other colors for different holidays. Wouldn't this look cute in red, white, and blue for Independence Day or green and red for Christmas?
Materials and Supplies
- Candle
- String (I used crochet thread, but embroidery thread would also work)
- Scissors
- Clear tape

How to Make This
1. Start with a solid-colored candle.
I found this white one at the Dollar Tree.
2. Measure the string to go around the candle.
Leave a couple extra inches so you have enough room to tie a knot in the back.
3. Cut multiple strings to cover the candle.
Use the first string that you cut in step 2 as a template.
4.Continue tying the strings on the candle.
Line up all the knots in the back.
5. Trim excess strings off the knots.

6. Line up the thread so it's straight.
I also used some clear tape over the knots to keep the string in place.
7. Sit back and admire your work.
Also see how these candles looked as part of my Easter Mantel.
Link Parties
Click here to see the link parties I visit each week.
Subscribe to:
Posts
(Atom)


Subscribe To


Grab A Button

