
Saturday, December 29, 2012
Ring in the New Year: Cleaning and Organization Challenge
There's something about early January that I find refreshing. It is full of promise--resolutions are not yet broken. Holiday decorations are packed away, and a new year is stretched before you.
This year, I want to get serious about cleaning and organization. I decided to put together a calendar of cleaning and organization items to tackle in January. I didn't include routine cleaning items that I already do, like washing the dishes, cleaning the bathrooms and sweeping the floors on this calendar. My list is focused on cleaning and organization projects that I never seem to get to. By tackling one or two items per day, I'm hoping to get through each item on this calendar in January.
Let's do this together! I created the Cleaning and Organization Challenge so we can all work together to get organized this year. Click here or click on the calendar to download the JPEG from Google Drive (you can also zoom in on Google Drive).

Here are the rules!
1. Refer to the calendar that I've attached to this post. Feel free to substitute items if one or more of the items don't make sense for your home.
2. Work ahead (or behind) as needed. The main goal is to finish all items by the end of each week and the entire calendar by the end of the month.
3. Go to the Missy Inspired Facebook page and click "Like." Join in on the post on 1/30 to sign up for the Cleaning and Organization Challenge. Post your progress every few days.
4. Keep up with your regular cleaning. I didn't include standard cleaning items on this calendar because I wanted to focus on the items that I never seem to complete. Here is my typical schedule:
Daily:
- Load and run dishwasher
- Clean and wipe down counters
- Clean and wipe down dining-room table
- Take out the trash
- Make the beds (mornings)
Weekly:
- Sweep the floors
- Mop the floors, if needed
Twice monthly:
- Clean the bathrooms
- Vacuum
- Change bed sheets

Monday, December 24, 2012
Handprint ornaments: Snowman family

We LOVE hand-crafted Christmas decorations around these parts. We also love little toddler hands. What could be better than putting the two together?
I came across this idea on a Little Bit Funky. They were super-easy and fast to make. The whole project took 30 minutes (not including paint-drying time). It was also pretty cheap because I had most of the supplies on hand. I only had to buy the ornaments and the Sharpies. Check out how I did it!
- Round ornaments (I used matte white)
- Sharpie markers--ultra fine point - black, orange, red
- Craft paint (I used light blue)
- Foam brush
- Paper plate (for paint)
- Ribbon
- Scissors
- Little toddler hands :)

How to make these ornaments
Step one: Paint your toddler's hands with craft paint, using a foam brush.
Step two: Place the ornament in the palm of your toddler's hands and close his fingers around the ornament. Wait about three seconds, then open his fingers.

Tip: I had the best luck with matte ornaments. We tried doing a few handprints on clear ornaments and ornaments with a shiny finish, but the handprints smeared. You might be able to pull off these ornaments with clear or shiny finishes with an older toddler who would stay more still.
Step three: Place the ornaments to dry. I just used the holders that came with the ornament packaging.
Step five: Let the ornaments dry for about an hour.
Step six: Use your black Sharpie and draw the eyes, mouth, top hat, and three buttons.
Step seven: Use your orange Sharpie to draw a little triangle for each nose.

Step eight: Use your red Sharpie to draw a scarf (optional). I added this step because I thought my snowmen needed some accessories. I just drew a thick line, then added some wispy lines on the end, for fringe.
Step nine: Write your toddler's name and year on the other side of the ornament. I printed the letters, then added little dots at the end of each stroke to make it look nice.

Step eleven: Watch grandparent's swoon over a homemade ornament from their grandchild. :)

Tuesday, December 18, 2012
Joyful front porch
I love a decorated front porch nearly as much as I love decorating my mantel. I decided to up my front-porch game this year and to go further than the standard wreath.
Here's the finished product. What do you think?

This was pretty easy to put together--much faster than my Autumn front porch. And it didn't even require power tools!
Here are some of the inspirations for this year's front porch:
Centsational Girl - I love the hanging ornaments and the large planters on either side of the front door.
Better Homes and Gardens - Love the fancy, yet rustic garland around the door.
Tumblr pic (no attribution found - Delightful symmetry.
Heart-2-Home - My inspiration for the joy wreath (see below for how I did it).

Joy wreath
This "JOY" decoration really spoke to me from Heart-2-Home. I'm not big into hanging seasonal decorations on the wall, so I thought a wreath would be the perfect solution. I also thought it would be fun to put the letters vertically, instead of horizontally.

I also thought it would look nice to contrast the glitz of the jingle wreath with burlap fabric. It took less than an hour to make.
Material and supplies:
- Two wreath forms
- Letters "J" and "Y"
- Ribbon
- Burlap
- Christmas floral wreath
- "Jingle" wreath
- Puh pins
- Hot glue
- Eye hooks (I used three)
- Nail or wreath holder
How to make this:
1. Cut burlap fabric in approximately 3-inch strips. I used some leftover burlap fabric from my burlap mat project.
2. Wrap the burlap around the wreath. Use push pins to hold the burlap in place.
3. Attach eye hooks to the back of each letter to attach the ribbon.
4. Tie the ribbon to the wreath and use a dab of hot glue to align the letters.
5. Use ribbon to attach the wreaths together. I started with the top wreath (J) and added extra ribbon at the bottom to tie it to the jingle wreath. Then I did the same to the next wreath, tying the jingle wreath to the "Y" wreath.
6. Add some Christmas floral pics to make the project look more finished and to hide some of the areas where you've attached the wreaths.

 I added some green garland around the door to add more of a rustic feel to the porch.
I wanted to hang Christmas lights on the porch this year, but that didn't happen. Instead, I decided to hang snowflakes. I bought a package of foam snowflakes from AC Moore in a few different sizes and bought some snowflake ornaments. I cut long strings of ribbon and hot glued the snowflakes to the ribbon. I hung them from the roof of our porch with 3M mini hooks. The roof of our porch is vinyl or plastic, so we can't nail anything into it.
I liked the look of these snowflakes. Unfortunately, the hooks didn't hold up against the elements. Within two rainy/snowy days, many of the hooks fell down. I'm still looking for a better solution that can handle the outdoors because I really liked the look of the hanging snowflakes.
What do you think? Have you found any solutions to hanging snowflakes, lights, or even planters from your porch, if you don't have a traditional wood roof? I'd love to hear any suggestions!
Here's the finished product. What do you think?

This was pretty easy to put together--much faster than my Autumn front porch. And it didn't even require power tools!
Here are some of the inspirations for this year's front porch:
Centsational Girl - I love the hanging ornaments and the large planters on either side of the front door.
Better Homes and Gardens - Love the fancy, yet rustic garland around the door.
Tumblr pic (no attribution found - Delightful symmetry.
Heart-2-Home - My inspiration for the joy wreath (see below for how I did it).

Check out Oscar's cameo in the bottom-left window pane. :)
Joy wreath
This "JOY" decoration really spoke to me from Heart-2-Home. I'm not big into hanging seasonal decorations on the wall, so I thought a wreath would be the perfect solution. I also thought it would be fun to put the letters vertically, instead of horizontally.

I also thought it would look nice to contrast the glitz of the jingle wreath with burlap fabric. It took less than an hour to make.
Material and supplies:
- Two wreath forms
- Letters "J" and "Y"
- Ribbon
- Burlap
- Christmas floral wreath
- "Jingle" wreath
- Puh pins
- Hot glue
- Eye hooks (I used three)
- Nail or wreath holder
How to make this:
1. Cut burlap fabric in approximately 3-inch strips. I used some leftover burlap fabric from my burlap mat project.
2. Wrap the burlap around the wreath. Use push pins to hold the burlap in place.
3. Attach eye hooks to the back of each letter to attach the ribbon.
4. Tie the ribbon to the wreath and use a dab of hot glue to align the letters.
5. Use ribbon to attach the wreaths together. I started with the top wreath (J) and added extra ribbon at the bottom to tie it to the jingle wreath. Then I did the same to the next wreath, tying the jingle wreath to the "Y" wreath.
6. Add some Christmas floral pics to make the project look more finished and to hide some of the areas where you've attached the wreaths.

Finishing touches
 I added some green garland around the door to add more of a rustic feel to the porch.
I also wanted to add some symmetry to the front porch with planters. I recycled the pots from my autumn porch. I found some grapevine forms at AC Moore and was able to use 50% coupons on them. To jazz them up, I snipped off some greenery from the doorway garland and filled the pots with them to anchor the vines.
My son and I then filled the bottoms of each of those pots with ornaments I bought at the dollar store. I then added gold floral pics to the top of each of the "trees" for some more interest.
I wanted to hang Christmas lights on the porch this year, but that didn't happen. Instead, I decided to hang snowflakes. I bought a package of foam snowflakes from AC Moore in a few different sizes and bought some snowflake ornaments. I cut long strings of ribbon and hot glued the snowflakes to the ribbon. I hung them from the roof of our porch with 3M mini hooks. The roof of our porch is vinyl or plastic, so we can't nail anything into it.
I liked the look of these snowflakes. Unfortunately, the hooks didn't hold up against the elements. Within two rainy/snowy days, many of the hooks fell down. I'm still looking for a better solution that can handle the outdoors because I really liked the look of the hanging snowflakes.
What do you think? Have you found any solutions to hanging snowflakes, lights, or even planters from your porch, if you don't have a traditional wood roof? I'd love to hear any suggestions!
Sunday, December 16, 2012
Holiday lantern garland

I fell in love--with a picture. It wasn't the first time, either. This picture from Better Homes and Gardens had me obsessed.
I followed the tutorial from this page: Felt Medallion Window Garland on BHG.com. It took me about three hour total, between folding the paper, hot gluing the paper, and hanging it in the window.
Materials and supplies (for each medallion):
hree 8x10 pieces of paper, decorative paper, hot glue gun, scissors, circle cutting tools (I used a 2-inch paper punch and a 4-inch paper cutter. I also used a small piece of garland for the center of each medallion.

Here are the steps I followed:
1. Accordion fold an 8 x 10 piece of card stock in about 1/2 inch folds.
2. Fold the paper in half lengthwise, to make a fan. Hot glue the middle folds together.

4. Cut out a 4" circle. I used this Martha Stewart circle cutter. Cut slits around the edge of the circle, to add some texture.
5. Cut a 2" circle. I used a 2" hole punch for this.
6. Glue the circles together, then glue a pinch of garland on top of it.
7. Make as many medallions as you need to fill your space.
8. Punch a small hole in one of the top folds of the medallion and string the medallion onto a ribbon.
9. Cut out some extra 4" circles. Glue two circles together between the ribbon.
10. Tie onto the curtain rod.
I'm actually not thrilled with how it came out. It's a little more "Carnival" than I was going for and I wish I had made the medallions a little smaller. At least it's festive though!

Sunday, December 9, 2012
Christmas mantel
If you've been reading my blog (or you've listened to me swoon over decorating), you know that I LOVE me a decorated mantel. It's one of my favorite places in the house to decorate. Also, because it's such a small space, it's easy to switch up the look for relatively cheap.
I decided to decorate the mantel a little differently this year. I've been obsessed with garland the last few months and I wanted to find a way to work that into my mantel, without doing a pennant garland like I did for Halloween and Andrew's race-car birthday party.
Here are a few of my inspiration pictures:
Houzz
Better Homes and Gardens
Here's what I came up with:

I didn't have any satin ribbon like the second inspiration link (boo hoo!), so I substituted some extra gold garland. I then hung some small ornaments with red ribbon and curled the ribbon ends. I finished the mantel with a picture from Andrew when he was 1 and a hand print of his from that same year. I also added in a few knick-knacks that find their way to my mantel most years. Then I added some holiday picks to fill it out.

What do you think? Have you done anything different with your mantel this year? Are you finding inspiration on Pinterest?
Saturday, December 1, 2012
Race-car birthday party
Today we had my son's third birthday. I *may* have gone a little overboard in the decorating and preparations. However the end result was well worth it! When my son came down in the morning, he was in awe of all the decorations--and that was even before I blew up about 30 balloons and frosted all the cupcakes.
This party was truly a labor of love. I made or ordered most of the decorations. I spent about an hour each night, for the week leading up to the party, working on decorations. A few days before the party, I asked Andrew what he wanted for his birthday. His response? "Cake, balloons, and candles." Well, I gave him that--and quite a bit more!

Decorations
The party had a race car theme. I also chose a blue and red color scheme, with checkerboard accents--because even a toddler birthday party needs a color scheme. ;)
I bought the decorations from Etsy (mostly from Paper + Pip Race Car Birthday Decorations) and a local party store (Party 4 Less). I wanted to go with some traditional streamers and balloons too. A couple of his favorite shows have had birthday episodes, so I knew Andrew would be excited to see balloons and streamers! I bought some blue and red streamers and balloons from the party store. We also picked up a small helium tank from BJ's Wholesale Club for about $25.
.JPG)
Mantel
I love a decorated mantel. It's usually one of the first things I start with when I decorate for a holiday or party. This mantel took me less than $5 to make. I bought two checkered flags, for $.99 each. The stoplights are decorated milk cartons. I spray painted them black; cut out the red, yellow, and green circles; then hot glued the circles to the cartons. I got the banner as part of a pack of Paper + Pip Race Car Birthday Decorations, that I got from Etsy. I added some ribbon and put some of Andrew's cars on the mantel, and it was done!
.JPG)
Buffet
The buffet was also pretty simple. I hung part of a checkered banner that I picked up at a party store for $1. The remainder of the banner was in the double windows behind our table. I put two more checkered flags in some red vases that I painted earlier in the week using the tutorial from Oh So Lovely. Then I framed a copy of the birthday invitation and layed out the plates, napkins, and placesettings.
I also taped some red, yellow, and green circles to our stereo speakers to make stop lights. Gotta stick with the theme!
.JPG) In retrospect, I wish I would have cleaned off our bulletin board a little more. That just slipped my mind in all the cleaning and party preparations.
In retrospect, I wish I would have cleaned off our bulletin board a little more. That just slipped my mind in all the cleaning and party preparations.
Food
We tried to stick to kid-friendly foods that adults would also eat. My husband is the cook in the family. He made meatballs, baked ziti, salad, and Kraft Mac and Cheese. I also ordered chicken fingers from a local restaurant. For appetizers, we had a veggie plate, a cheese plate, and a fruit plate.
Dessert
Instead of making or ordering a cake, I made cupcakes. I used the Funfetti cake mix and frosting--bonus that the frosting was the perfect shade of blue. To decorate the cupcakes, I used one of those Wilton cupcake decorators to make a nice swirl. Then I added some blue and red M&Ms and put some white sprinkles on them. I bought the cupcake liners from Sweets and Treats Boutique. I also added some cardstock flags that I bought as part of my Paper + Pip Race Car Birthday Decorations. I attached the flags to lollipop sticks, using hot glue.
 I decided to make my own cupcake stand instead of buying one online. It was pretty easy:
- I bought an 8-pack of cake rounds from the craft store.
- I used two 12", two 10", and two 8" rounds. I hot glued two of each size together.
- I covered a couple of Campbells soup cans in checkered paper and hot glued the tower.
- To finish it off, I glued some ribbon around all of the edges and put a red charger--picked up from Target for $1.99--at the bottom.
I'm really happy with how it turned out. I was pretty nervous that the tower might crash, but it held up! To make the tower, I followed a tutorial from Annie's Eats.
We also served Hoodsie Cups in place of scooped ice cream. It's so much faster and neater! In addition, I made Rice Krispie Treat stoplights by adding red, yellow, and green M&Ms to rice krispies.

Games
We had six kids at the party, ranging from 1 1/2 - 6 years old. Most of the kids were in the 3-4 range. I wanted to keep them busy, so I planned a few activities. Here's what we did:
1. Fruit loop necklaces. I bought some colored shoe laces at the dollar store and bought a box of Fruit Loops. The kids had a blast making their necklaces. It was fun and it was great for fine motor skills!

.JPG) Here's a picture of the kids stringing the necklaces and one of Andrew modeling his necklace.
Here's a picture of the kids stringing the necklaces and one of Andrew modeling his necklace.
2. Bean bag toss. I made a stoplight using black construction paper and red, yellow, and green circles. We also made our own beanbags. I bought white tube socks at the Dollar Tree and filled them with cheap split beans. The kids had fun throwing the bean bags at the colored spaces.

3. Twister/Lego tower. My husband wanted to take part in the DIY crafts. He put together a spinner, similar to what you'd see in a Twister game. He used two of the extra cake rounds that I bought for the cupcake tower. Then he used a lollipop stick and an empty medical-tape plastic ring. For the pointer, he cut a small plastic package tie. Then he glued a colored circle on each of four spaces.
The goal of the game was for the kids to spin the circle to choose a color. Once they picked the color, they were supposed to choose a lego of that color to start building a tower. By the time we got to that game, the kids were pretty wiped out though. Just spinning the circle ended up becoming the game!

Other touches
Birthday shirt. I ordered Andrew a shirt from Lisa Gorno on Etsy. It was really cute and came fast. In retrospect, I think I could have made this shirt myself by adding a "3" applique to a shirt. However, I wasn't really up for it with all the other decorations I took on.
Invitations. I ordered his invitations from Eventful Cards. I fell in love with these invitations pretty early and they really shaped my vision for his decorations. I bought the JPEG from this shop, then had the invitations printed at Walgreens on photo paper.
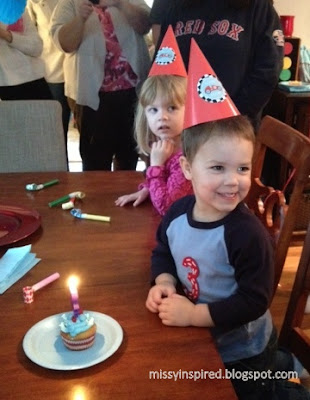 Birthday hats. I bought cheap birthday hats at the party store for $.99. I then decorated them using cutouts from the Paper + Pip Race Car Birthday Decorations kit. Paper + Hot glue gun = Custom party hats.
Party favors. I also made some party favors for the kids. Most of the items were car-related and came from the dollar bins at Target and Michaels. I also added a few temporary tattoos, stickers, and play-doh. I put everything in a clear treat bag, then stapled a Thank-You label from the Paper + Pip Race Car Birthday Decorations kit.
I had a bunch more ideas for Andrew's birthday party that I never got to do. Check out the ideas I came across on my Race car birthday Pinterest board.
This party was truly a labor of love. I made or ordered most of the decorations. I spent about an hour each night, for the week leading up to the party, working on decorations. A few days before the party, I asked Andrew what he wanted for his birthday. His response? "Cake, balloons, and candles." Well, I gave him that--and quite a bit more!

Decorations
The party had a race car theme. I also chose a blue and red color scheme, with checkerboard accents--because even a toddler birthday party needs a color scheme. ;)
I bought the decorations from Etsy (mostly from Paper + Pip Race Car Birthday Decorations) and a local party store (Party 4 Less). I wanted to go with some traditional streamers and balloons too. A couple of his favorite shows have had birthday episodes, so I knew Andrew would be excited to see balloons and streamers! I bought some blue and red streamers and balloons from the party store. We also picked up a small helium tank from BJ's Wholesale Club for about $25.
.JPG)
Mantel
I love a decorated mantel. It's usually one of the first things I start with when I decorate for a holiday or party. This mantel took me less than $5 to make. I bought two checkered flags, for $.99 each. The stoplights are decorated milk cartons. I spray painted them black; cut out the red, yellow, and green circles; then hot glued the circles to the cartons. I got the banner as part of a pack of Paper + Pip Race Car Birthday Decorations, that I got from Etsy. I added some ribbon and put some of Andrew's cars on the mantel, and it was done!
.JPG)
Buffet
The buffet was also pretty simple. I hung part of a checkered banner that I picked up at a party store for $1. The remainder of the banner was in the double windows behind our table. I put two more checkered flags in some red vases that I painted earlier in the week using the tutorial from Oh So Lovely. Then I framed a copy of the birthday invitation and layed out the plates, napkins, and placesettings.
I also taped some red, yellow, and green circles to our stereo speakers to make stop lights. Gotta stick with the theme!
.JPG)
Food
We tried to stick to kid-friendly foods that adults would also eat. My husband is the cook in the family. He made meatballs, baked ziti, salad, and Kraft Mac and Cheese. I also ordered chicken fingers from a local restaurant. For appetizers, we had a veggie plate, a cheese plate, and a fruit plate.
Dessert
Instead of making or ordering a cake, I made cupcakes. I used the Funfetti cake mix and frosting--bonus that the frosting was the perfect shade of blue. To decorate the cupcakes, I used one of those Wilton cupcake decorators to make a nice swirl. Then I added some blue and red M&Ms and put some white sprinkles on them. I bought the cupcake liners from Sweets and Treats Boutique. I also added some cardstock flags that I bought as part of my Paper + Pip Race Car Birthday Decorations. I attached the flags to lollipop sticks, using hot glue.
 I decided to make my own cupcake stand instead of buying one online. It was pretty easy:
- I bought an 8-pack of cake rounds from the craft store.
- I used two 12", two 10", and two 8" rounds. I hot glued two of each size together.
- I covered a couple of Campbells soup cans in checkered paper and hot glued the tower.
- To finish it off, I glued some ribbon around all of the edges and put a red charger--picked up from Target for $1.99--at the bottom.
I'm really happy with how it turned out. I was pretty nervous that the tower might crash, but it held up! To make the tower, I followed a tutorial from Annie's Eats.
We also served Hoodsie Cups in place of scooped ice cream. It's so much faster and neater! In addition, I made Rice Krispie Treat stoplights by adding red, yellow, and green M&Ms to rice krispies.

Games
We had six kids at the party, ranging from 1 1/2 - 6 years old. Most of the kids were in the 3-4 range. I wanted to keep them busy, so I planned a few activities. Here's what we did:
1. Fruit loop necklaces. I bought some colored shoe laces at the dollar store and bought a box of Fruit Loops. The kids had a blast making their necklaces. It was fun and it was great for fine motor skills!

.JPG)
2. Bean bag toss. I made a stoplight using black construction paper and red, yellow, and green circles. We also made our own beanbags. I bought white tube socks at the Dollar Tree and filled them with cheap split beans. The kids had fun throwing the bean bags at the colored spaces.

3. Twister/Lego tower. My husband wanted to take part in the DIY crafts. He put together a spinner, similar to what you'd see in a Twister game. He used two of the extra cake rounds that I bought for the cupcake tower. Then he used a lollipop stick and an empty medical-tape plastic ring. For the pointer, he cut a small plastic package tie. Then he glued a colored circle on each of four spaces.
The goal of the game was for the kids to spin the circle to choose a color. Once they picked the color, they were supposed to choose a lego of that color to start building a tower. By the time we got to that game, the kids were pretty wiped out though. Just spinning the circle ended up becoming the game!

Other touches
Birthday shirt. I ordered Andrew a shirt from Lisa Gorno on Etsy. It was really cute and came fast. In retrospect, I think I could have made this shirt myself by adding a "3" applique to a shirt. However, I wasn't really up for it with all the other decorations I took on.
Invitations. I ordered his invitations from Eventful Cards. I fell in love with these invitations pretty early and they really shaped my vision for his decorations. I bought the JPEG from this shop, then had the invitations printed at Walgreens on photo paper.
 Birthday hats. I bought cheap birthday hats at the party store for $.99. I then decorated them using cutouts from the Paper + Pip Race Car Birthday Decorations kit. Paper + Hot glue gun = Custom party hats.
Party favors. I also made some party favors for the kids. Most of the items were car-related and came from the dollar bins at Target and Michaels. I also added a few temporary tattoos, stickers, and play-doh. I put everything in a clear treat bag, then stapled a Thank-You label from the Paper + Pip Race Car Birthday Decorations kit.
I had a bunch more ideas for Andrew's birthday party that I never got to do. Check out the ideas I came across on my Race car birthday Pinterest board.
Subscribe to:
Posts
(Atom)


Subscribe To


Grab A Button

