
Showing posts with label Kid crafts. Show all posts
Showing posts with label Kid crafts. Show all posts
Thursday, February 14, 2013
Send a Valentine's Day Hug
The little man and I had a lot of fun putting together his Valentine's Day cards for the grandparents and great grandparents. I saw this idea on Fun Family Crafts last year and thought the grandparents would go nuts over it! (And I was right!)

- Paint
- Paint brushes
- Ribbon
- Letter stickers
- Hot glue gun or adhesive
- Scissors


The Trendy Treehouse
DIY Craft Projects
I Gotta Create
Southern Lovely
Create.Craft.Love.
The Shabby Creek Cottage
Katherine's Corner
Craftionary
Blissful and Domestic
Twinkle in the Eye
Joyful Stamper
A Little Knick Knack
Homemaker on a Dime
Raising Memories
I Heart Naptime
The Foley Fam
C.R.A.F.T.
Create With Joy
Sew Can Do
Keeping it Simple Crafts

Materials and supplies
- Cardstock- Paint
- Paint brushes
- Ribbon
- Letter stickers
- Hot glue gun or adhesive
- Scissors

How to make this
1. Paint the outside of the card.
We had a lot of fun doing this! I set up some masks (using heart punches and other cut outs of hearts), so the little guy could paint and I could remove the masks after he was done and have some blank shapes.


2. Find some little hands to paint!
I used a foam roller to cover his hands in paint, then pressed his hands onto the papers. I repainted between each hand print.3. After the paint dries, cut around the hand prints.
4. Take the ribbon and measure the length of a hug.
I had him spread open his arms, then measured from wrist to wrist.5. Glue the ribbon to the back of each hand.
6. Use the letter stickers to write your chosen message.

Link parties
Delightful OrderThe Trendy Treehouse
DIY Craft Projects
I Gotta Create
Southern Lovely
Create.Craft.Love.
The Shabby Creek Cottage
Katherine's Corner
Craftionary
Blissful and Domestic
Twinkle in the Eye
Joyful Stamper
A Little Knick Knack
Homemaker on a Dime
Raising Memories
I Heart Naptime
The Foley Fam
C.R.A.F.T.
Create With Joy
Sew Can Do
Keeping it Simple Crafts
Sunday, January 13, 2013
Matchbox car garage
My little guy is OBSESSED with cars. One morning a few weeks ago, he tried to make his own garage using dominos. That got my husband and I thinking that we should make him a garage.
This was a fun project that used materials we had around the house. It took about 2-3 hours, but was pretty easy to make.
.JPG)
Supplies:
- Cardboard box
- Empty paper towel roll
- Duct tape (black)
- Packing tape
- Scissors
- Knife
- Pencil
- Black marker

How to:
1. Start with a large cardboard box.
 2. Cut the top pieces off the box. Use packing tape to reinforce the box, as necessary.

3. Cut two holes in the front of the box. These will be the garage doors.

4. Make the second story for the garage. Cut a strip of cardboard about 1/3 the size of the box. Cut the paper towel role in three equal pieces. Tape it to the cardboard strip.

5. Attach the second story of the garage to the floor of the box using duct tape.

6. Add a ramp for cars to get up to the second floor. Cut a strip from the cardboard and attach it with the duct tape.

7. Draw in the parking spaces. We put ours about two inches apart.
 8. Add a small lip to the top of the second floor of the garage to keep the cars from rolling off. Cut another small strip of cardboard and attach it with duct tape.
9. Paint or tape the garage with duct tape.

9. Add any "decorations" that you want. We added a garage and a parking sign. We also let our son color a few cardboard signs to hang around the outside of the garage.
10. Add the cars and enjoy!


This was a fun project that used materials we had around the house. It took about 2-3 hours, but was pretty easy to make.
.JPG)
Supplies:
- Cardboard box
- Empty paper towel roll
- Duct tape (black)
- Packing tape
- Scissors
- Knife
- Pencil
- Black marker

How to:
1. Start with a large cardboard box.
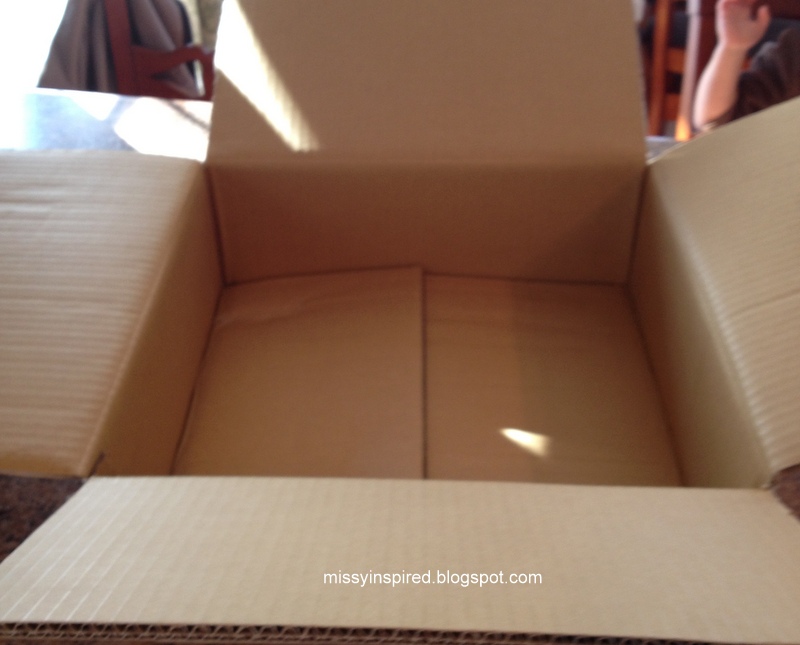

3. Cut two holes in the front of the box. These will be the garage doors.

4. Make the second story for the garage. Cut a strip of cardboard about 1/3 the size of the box. Cut the paper towel role in three equal pieces. Tape it to the cardboard strip.

5. Attach the second story of the garage to the floor of the box using duct tape.

6. Add a ramp for cars to get up to the second floor. Cut a strip from the cardboard and attach it with the duct tape.

7. Draw in the parking spaces. We put ours about two inches apart.

9. Paint or tape the garage with duct tape.

9. Add any "decorations" that you want. We added a garage and a parking sign. We also let our son color a few cardboard signs to hang around the outside of the garage.
10. Add the cars and enjoy!


Monday, December 24, 2012
Handprint ornaments: Snowman family

We LOVE hand-crafted Christmas decorations around these parts. We also love little toddler hands. What could be better than putting the two together?
I came across this idea on a Little Bit Funky. They were super-easy and fast to make. The whole project took 30 minutes (not including paint-drying time). It was also pretty cheap because I had most of the supplies on hand. I only had to buy the ornaments and the Sharpies. Check out how I did it!
- Round ornaments (I used matte white)
- Sharpie markers--ultra fine point - black, orange, red
- Craft paint (I used light blue)
- Foam brush
- Paper plate (for paint)
- Ribbon
- Scissors
- Little toddler hands :)

How to make these ornaments
Step one: Paint your toddler's hands with craft paint, using a foam brush.
Step two: Place the ornament in the palm of your toddler's hands and close his fingers around the ornament. Wait about three seconds, then open his fingers.

Tip: I had the best luck with matte ornaments. We tried doing a few handprints on clear ornaments and ornaments with a shiny finish, but the handprints smeared. You might be able to pull off these ornaments with clear or shiny finishes with an older toddler who would stay more still.
Step three: Place the ornaments to dry. I just used the holders that came with the ornament packaging.
Step five: Let the ornaments dry for about an hour.
Step six: Use your black Sharpie and draw the eyes, mouth, top hat, and three buttons.
Step seven: Use your orange Sharpie to draw a little triangle for each nose.

Step eight: Use your red Sharpie to draw a scarf (optional). I added this step because I thought my snowmen needed some accessories. I just drew a thick line, then added some wispy lines on the end, for fringe.
Step nine: Write your toddler's name and year on the other side of the ornament. I printed the letters, then added little dots at the end of each stroke to make it look nice.

Step eleven: Watch grandparent's swoon over a homemade ornament from their grandchild. :)

Subscribe to:
Posts
(Atom)


Subscribe To


 Posts
All Comments
Posts
All Comments
Grab A Button

